Sticky Notes and Tasks
You'll notice that we've added two resource lanes to your project during the setup process.
- A lane for your tasks
- A lane for any tasks who's resource has yet to be assigned
Creating Tasks
Each resource lane has a plus button in the top left which you can use to add tasks to your plan.
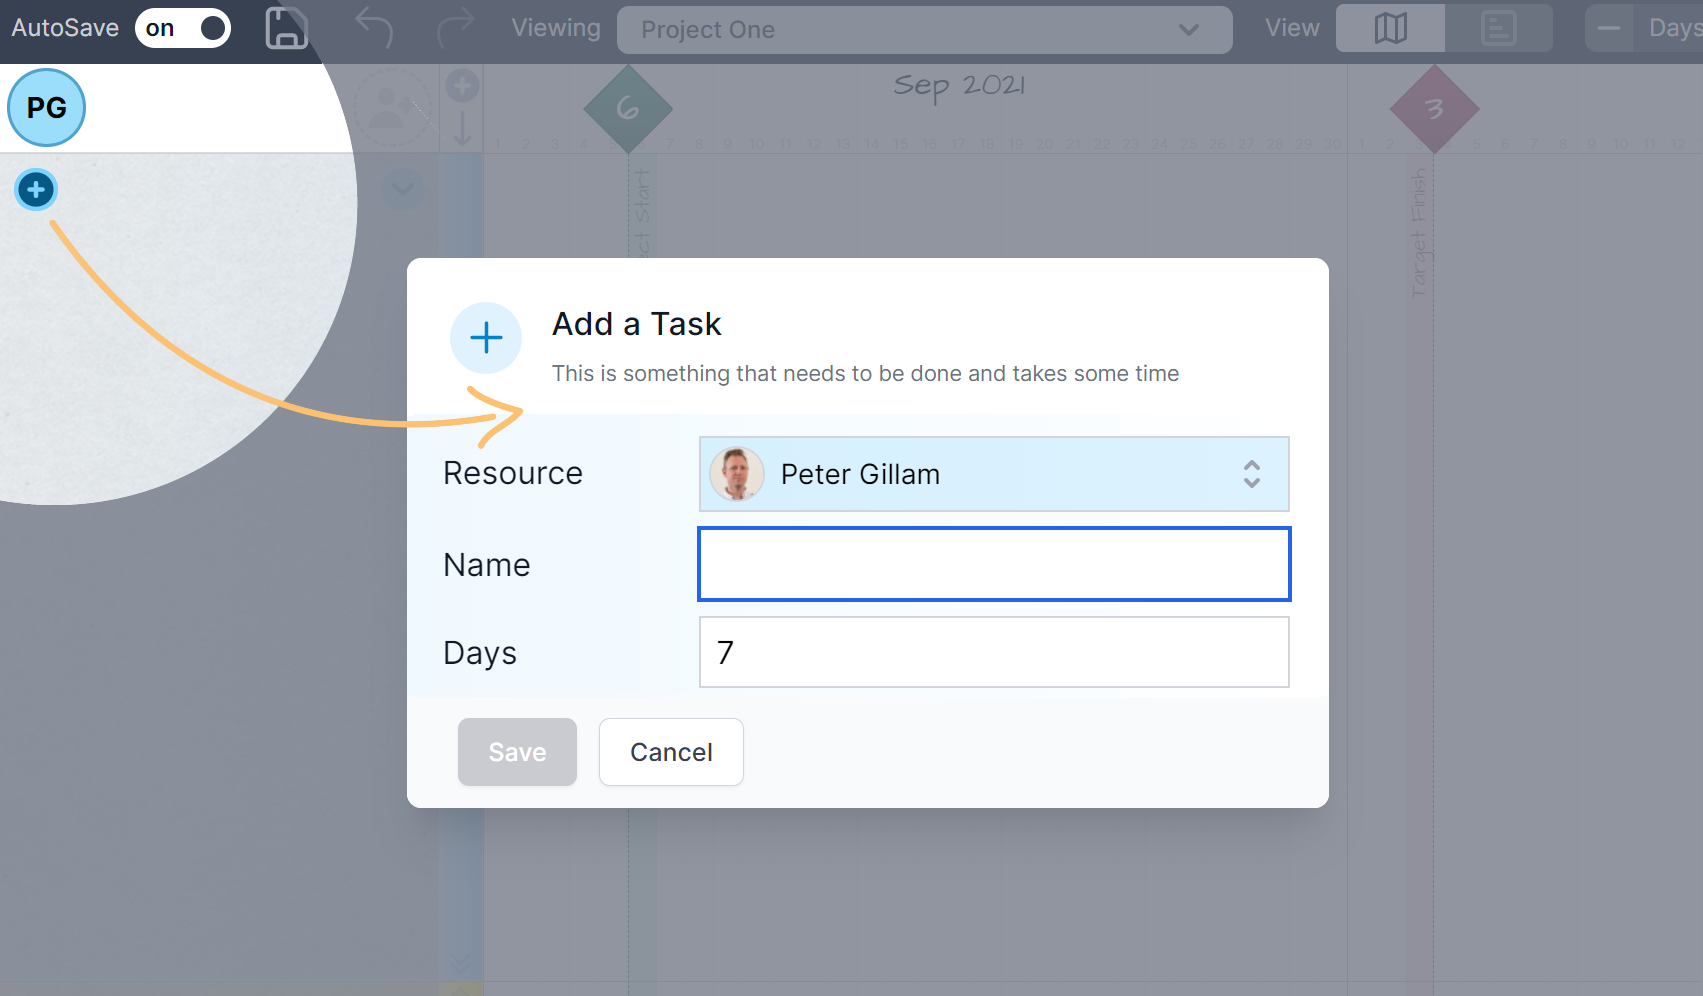
Once you've given the task a name, some days over which it should be completed and assigned a resource, click Save.
Note that the resource defaults to match the current lane. This can be easily changed using the resource selector provided.
Moving Sticky Notes
New tasks are displayed as sticky notes stacked in the resource lane. To plan this task, drag it from the stack to the sticky note zone.
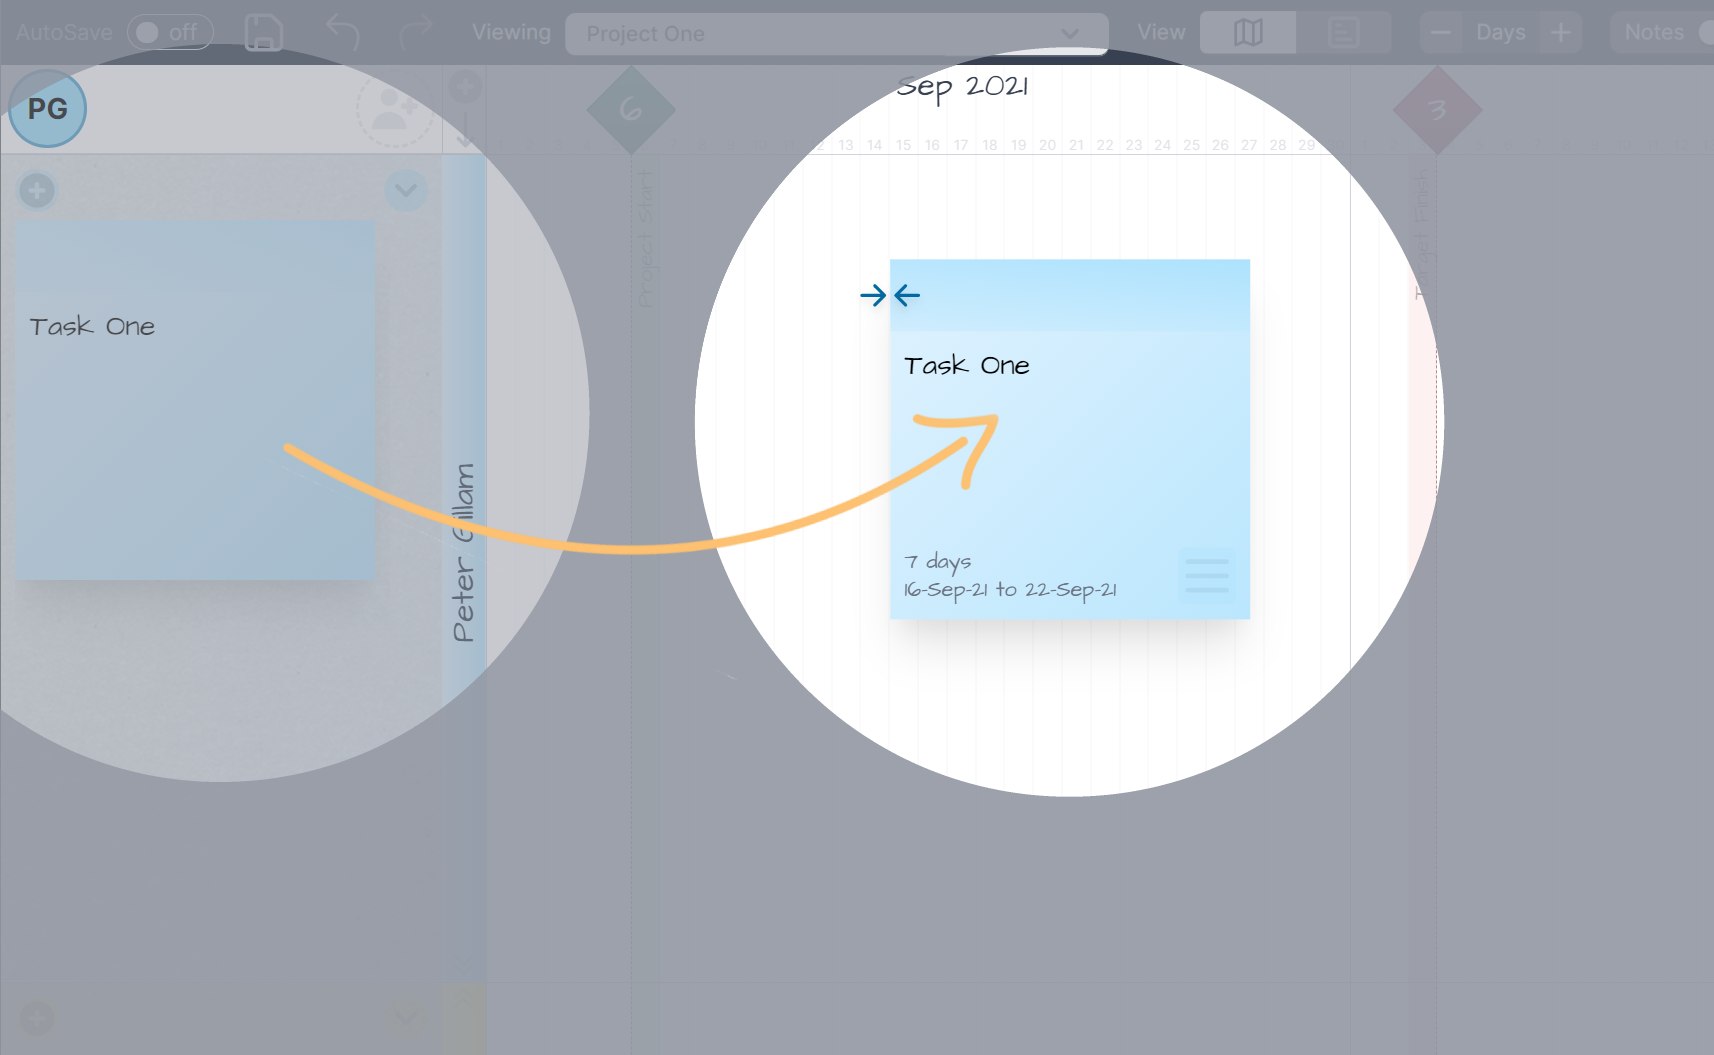
After dropping this note onto the board, you'll see that:
- The left hand edge of the note has been used as a start date, indicated by the arrows in the top-left corner of the glue-strip.
- The completion date has been calculated for you based on the start date and the days you entered when you created the task.
- After clicking the note the size of the note can be changed using any one of 8 resizing handles.
- The note has a menu button placed in the bottom-right of the note.
The Glue-Strip
We use the darker top section (the glue-strip) of each note to help you tell us how you'd like the location of the sticky note infrom the dates of the underlying task.
Hovering over the glue-strip presents you with three options:
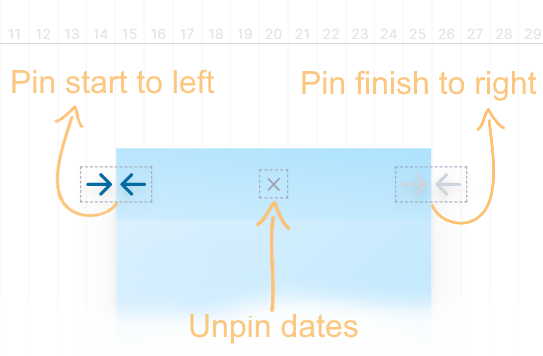
- Pin start to the left: As you move the note around the board the left edge of the note will set the start date of the task. The finish date will be calculated based on the how many days were specified.
- Pin finish to the right: As you move the note around the board the right edge of the note will set the finish date of the task. The start date will be calculated back from the number of days that were specified.
- Unpin dates: The dates for the task will be calculated for you based on the planning style and any links the task has to other tasks in the plan.
Projects with an earliest planning style with have notes the start pinned with the left hand edge. If the planning style is set to latest the task will have its finish pinned by the right hand edge of the note. This is just a useful default and can be changed as you plan.
The Sticky Note Menu
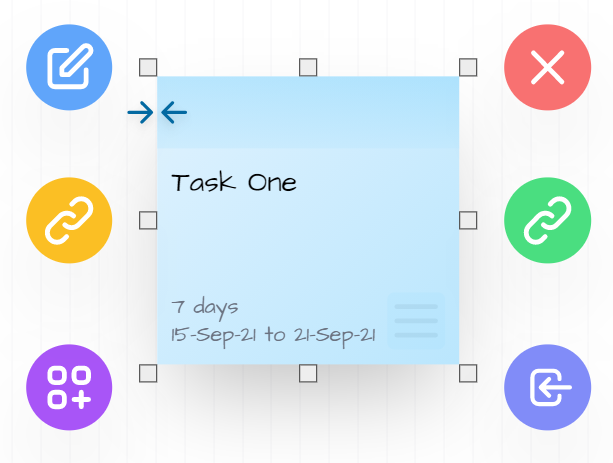
Clicking the hamburger button in the bottom right of the sticky note opens the note's action menu. To hide the menu just click the hamburger button again.
When the action menu is open the default drag-n-drop behaviour of the note will be deactivated. It will return to it's default behaviour when the menu is closed.
The actions performed by each button are listed below.
| Icon | Action |
|---|---|
 | Edit: Use this to edit the task. You can change the name, days and resource. |
 | Delete: This button deletes the sticky note and the task it represents. |
 | Restack: This puts the sticky note back on the stack zone of the resource lane. This can be especially useful when moving a note to a distant part of the planning board. |
 | Breakdown: Transforms a sticky note into a sticky folder, and navigates you to a sub-plan for the performing this task. We'll talk about this more about this feature in Working with Sticky Folders |
 | Add Predecessor Task: Use this to add a task which will be scheduled to happen before the selected task. |
 | Add Successor Task: Use this to add a task which will be scheduled to happen after the selected task. |
We'll be digging deeper into predecessor and successor tasks later in this guide: Working with Linked Tasks.
Before we look into some of the more powerful ways you can work with tasks, let's continue with our tour of the planning board.