Planning Board Basics
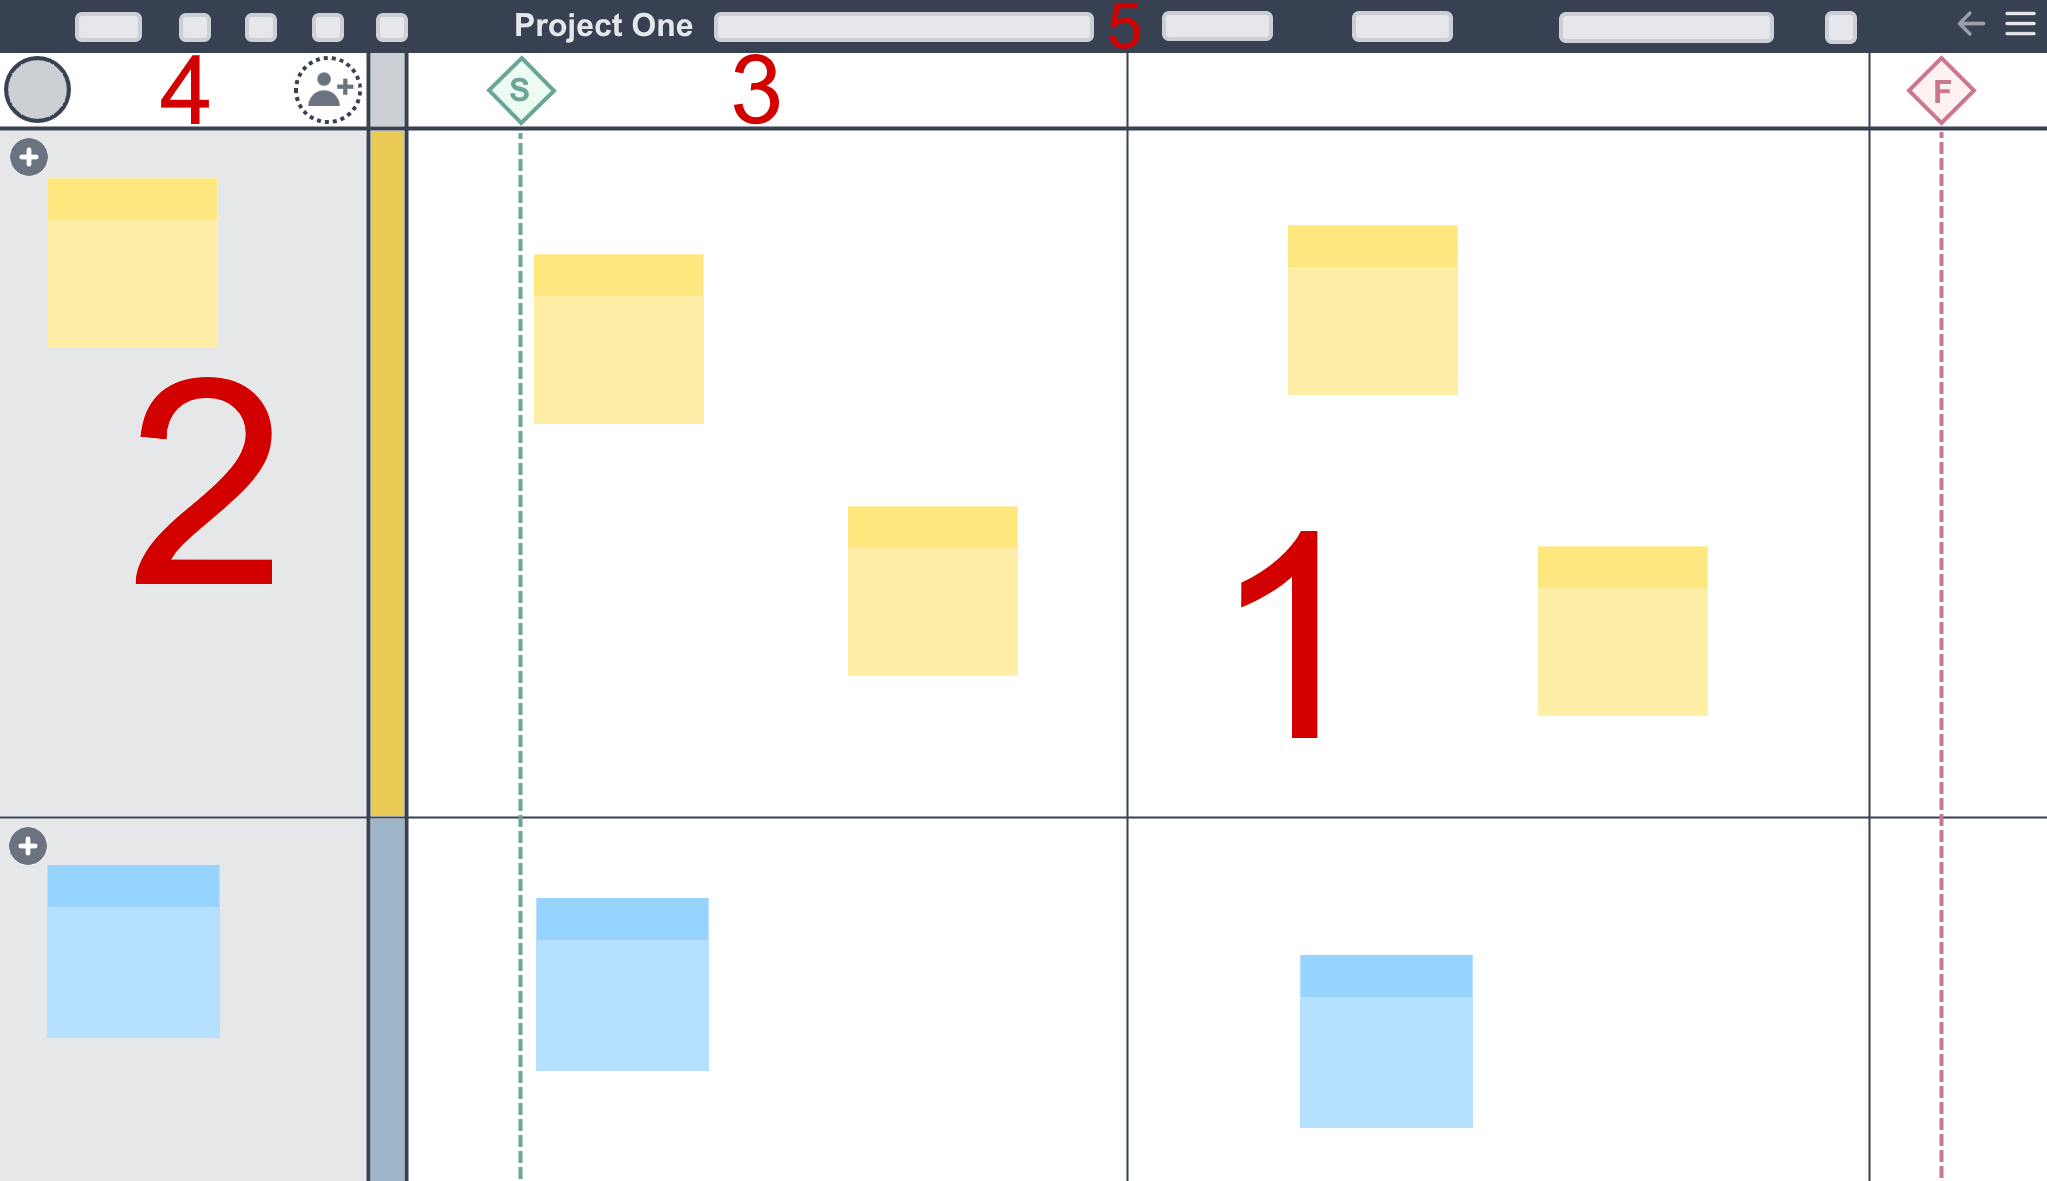
The planning board is where you'll spend most of your time in Project Notes. You'll instantly see your project name (in the plan selector), start date (left in green) and finish date (right in red)
We'll cover each part of the planning board in detail in the sections that follow. Here's a quick summary of what you'll see when you first create a new project.

1. Sticky Note Zone
Your sticky notes can be moved around this zone of the board and dropped from the stack waiting in each resource lane.
2. Resource Zones
These horizontal lanes are used to represent resources in your project. Sticky notes are created in the zones and can be dragged and dropped into the sticky note zone. You can also rename the resource here and associate the resource with a team member.
3. Timeline Zone
This zone represents the months and days of project activity. You'll also create project milestones and events here.
4. Team Zone
You'll see an avatar representing your presense in the project here and any other team members also present in the session. This zone is also used to invite more people into the project team.
5. Toolbar
In most cases you'll interact directly with the planning board to make any changes. When you need to switch views and navigate sub-plans within the project you'll be using the toolbar.
We'll be looking into all the features of the toolbar later on in this guide. Since you've now got a good idea of the layout of the board, let's start planning ...